Preprocessing LiDAR
Before LiDAR data can be used by the application, it should be clipped to the extend of the study area to reduce the amount of data, since the computation time might be too much to handle for an ordinary computer otherwise. The clipping can be done using ArcGIS and the free toolbox LAStools, which can be downloaded here.
After downloading the toolbox, unzip the file and save the tool on your hard drive. Then, open a new document in ArcMap and import your LiDAR data. After that, click on the toolbox icon as it is shown below.
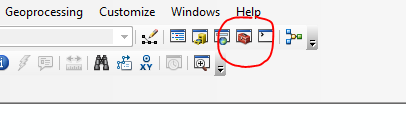
After that, right-click on ArcToolbox and click on Add Toolbox. A new window will open, looking like this:
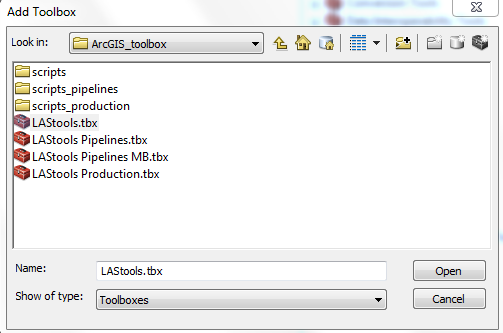
Click on the Connect to folder button in upper right corner and navigate to the folder containing the toolbox. Select the file LAStool.tbx and press open.
The toolbox is now added to ArcMap. To clip the LiDAR data to the correct extend, click on the ArcToolbox icon again. Choose the LAStool toolbox and select the tool lasclip. The tool window opens, as it can be seen below.
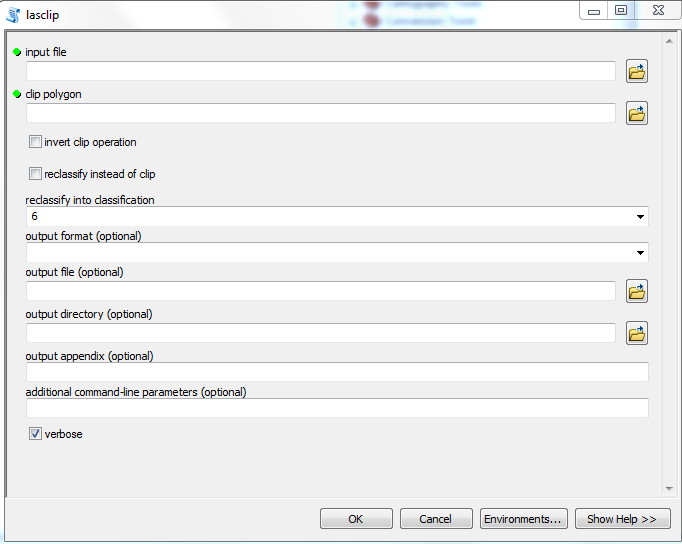
Use the following input and output features:
- Input File: LiDAR dataset
- Clip Polygon: shapefile of borders of study area
- Reclassify into Classification: leave this at 6
- Output Format: leave this one blank
- Output File: folder and name for new file
- Output Directory: leave this one blank
- Output Appendix: leave this one blank
- Additional Command-line Parameters: leave this one blank
Leave the rest of the setting on default and press OK. Your dataset will then be clipped and is ready to use in our application.